Creating an open source Ruby gem is easier than you might think! In this post, we will be walking through the process of creating and publishing a Ruby gem from start to finish.
Terminology
First off, let’s define some terms and describe their relevance:
- Ruby gem: A Ruby gem is a distributable library of Ruby code. Gems are how we share Ruby code. Learn more.
- rubygems.org: The Ruby community’s gem hosting service. Contribute. Learn more.
- bundler: The Ruby community’s gem manager. Learn more.
- CI: Continuous Integration is, in the context of this blog post, the process of automatically running a test suite on every commit and ensuring those tests remain passing by preventing merges to
mainwithout a passing test suite (or as we like to call it where I work at Gusto, a “green build”). Learn more. - CD: Continuous Deployment is, also in the context this blog post, the process of automatically pushing new versions of a Ruby Gem to rubygems.org every time three things are true: (1) A commit is merged to main (2) that commit has a green build (3) The gem version has been updated.
- GitHub Actions: A build system provided by GitHub that we will be using as the “compute” for our CI and CD pipelines. Learn more.
Whew! Now we can get onto the fun stuff…
Let’s Get Started
To keep things tidy, I’ll be referencing commits and pull requests. If you have a question about any part of the code, please drop an inline GitHub comment and tag my GitHub username (also @alexevanczuk). I’ve done my best to leave some inline comments, and I’d also highly encourage checking out the world-class documentation on https://guides.rubygems.org/ and https://docs.github.com/en. I’ve done my best not to repeat too much that is already discoverable in those docs.
Create the Repository
To start off, I’d highly recommend using the GitHub CLI. You can install it with brew install gh . Of course, any git and GitHub client will work just fine.
I’ll use gh repo create to create a new repository to host my gem. I use the name my_example_gem as the name of my repo and gem. Try to find a name that is meaningful to you and your stakeholders.
~/workspace - $ gh repo create
? What would you like to do? Create a new repository on GitHub from scratch
? Repository name my_example_gem
? Description An example gem set up with CI and CD.
? Visibility Public
? Would you like to add a README file? No
? Would you like to add a .gitignore? No
? Would you like to add a license? No
? This will create "my_example_gem" as a public repository on GitHub. Continue? Yes
✓ Created repository alexevanczuk/my_example_gem on GitHub
? Clone the new repository locally? Yes
Initialized empty Git repository in /Users/alex.evanczuk/workspace/my_example_gem/.git/
When I navigate to https://github.com/alexevanczuk/my_example_gem, I see this screen:
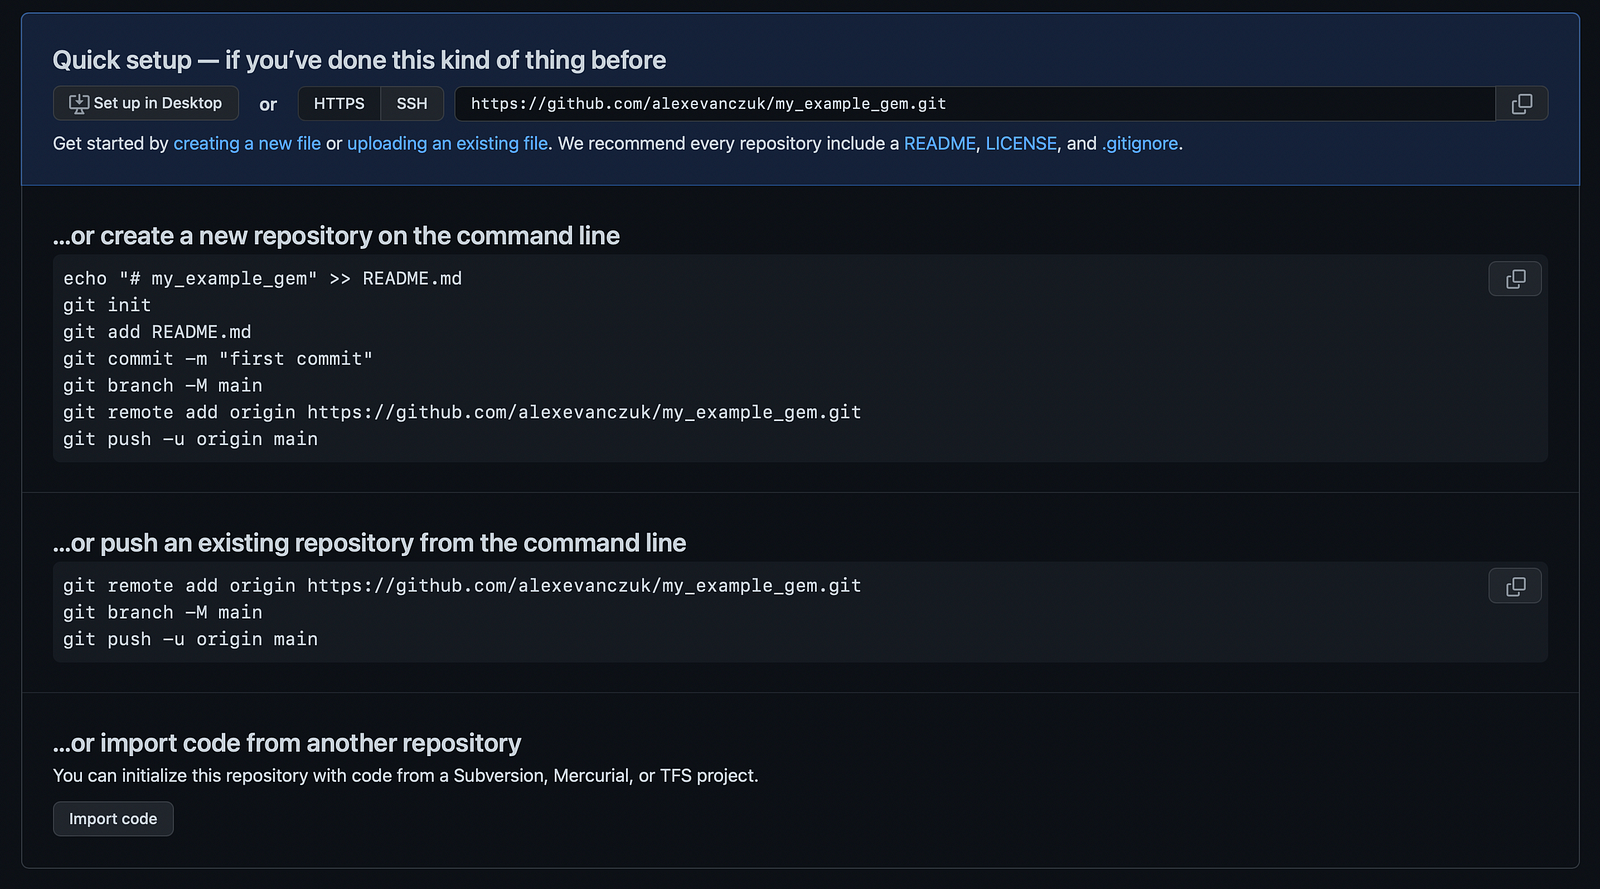
I navigate into the newly created gem folder with cd my_example_gem and follow the set of instructions labeled “create a new repository on the command line,” which created this commit:

Create the Gem
bundler makes this easy. I first cd .. to go up to the parent directory, then run:
bundle gem my_example_gem --coc --test=rspec --linter=rubocop --mitSome notes about this:
- I press enter when it asks me if I want to overwrite the existing
README.md bundlerhas a flag--ci=github, but we’ll be building this ourselves.- I use the MIT License, which is very common license used for open source software projects. If you’re affiliated with an organization or a company, you’ll want to make sure you’re familiar with its licensing requirements (i.e. talk to your legal team).
If all went to plan, you should be ready to create a PR, with these steps:
cdinto your repo (cd my_example_gemfor me)- Checkout a branch:
git checkout -b create-gem - Stage all changes:
git add . - Commit staged changes with
git commit -m "bundle gem my_example_gem --coc --test=rspec --linter=rubocop --mit” - Create a PR:
gh pr create - Merge the PR:
gh pr merge
settings => generalmainsettings => branches => Add rule
Great! We have one merged PR:

More Boiler Plate
If you run bundle install at this point in your repo, you may see this:
The gemspec at /Users/alex.evanczuk/workspace/my_example_gem/my_example_gem is not valid. Please fix this gemspec.
The validation error was 'metadata['homepage_uri'] has invalid link: "TODO: Put your gem's website or public repo URL here."'
I make some changes until I can bundle install. I’ve also changed some of the defaults, such as specifying spec.filesmore plainly rather than using git .
Follow the same process above to create and merge a PR. You can see the merged PR here:

Get an API Key
We need a rubygems.org API key to push. Get one from https://rubygems.org/profile/api_keys! You’ll need to create an account and login if you haven’t, and your gem needs the “Push rubygem” API scope.
Then, add that gem as a secret to your repo. You can find that under settings => secrets => actions . Create a new secret with the name RUBYGEMS_API_KEY and set the secret value. Make sure not to put this secret anywhere that others can find it — it’s a secret after all. I like to put mine in my 1Password as a note in my rubygems.org login. If you’re doing this for a company, make sure you follow your organization’s policies for login and secrets management.
Add CI and CD
Checkout a new branch with git checkout -b add-ci-and-cd
For this, we’ll be using GitHub Actions. GitHub Actions use a special syntax to define their logic. To learn more about how these actions work, check out the PR that add them and the inline comments.
I had to do three more things to finish this:
- I removed a trivially failing test
- I ran
bundle exec rubocop -ato auto fix rubocop - I ran
bundle lock --add-platform x86_64-linux, which letsbundlework in GitHub Actions, which uses a linux machine.
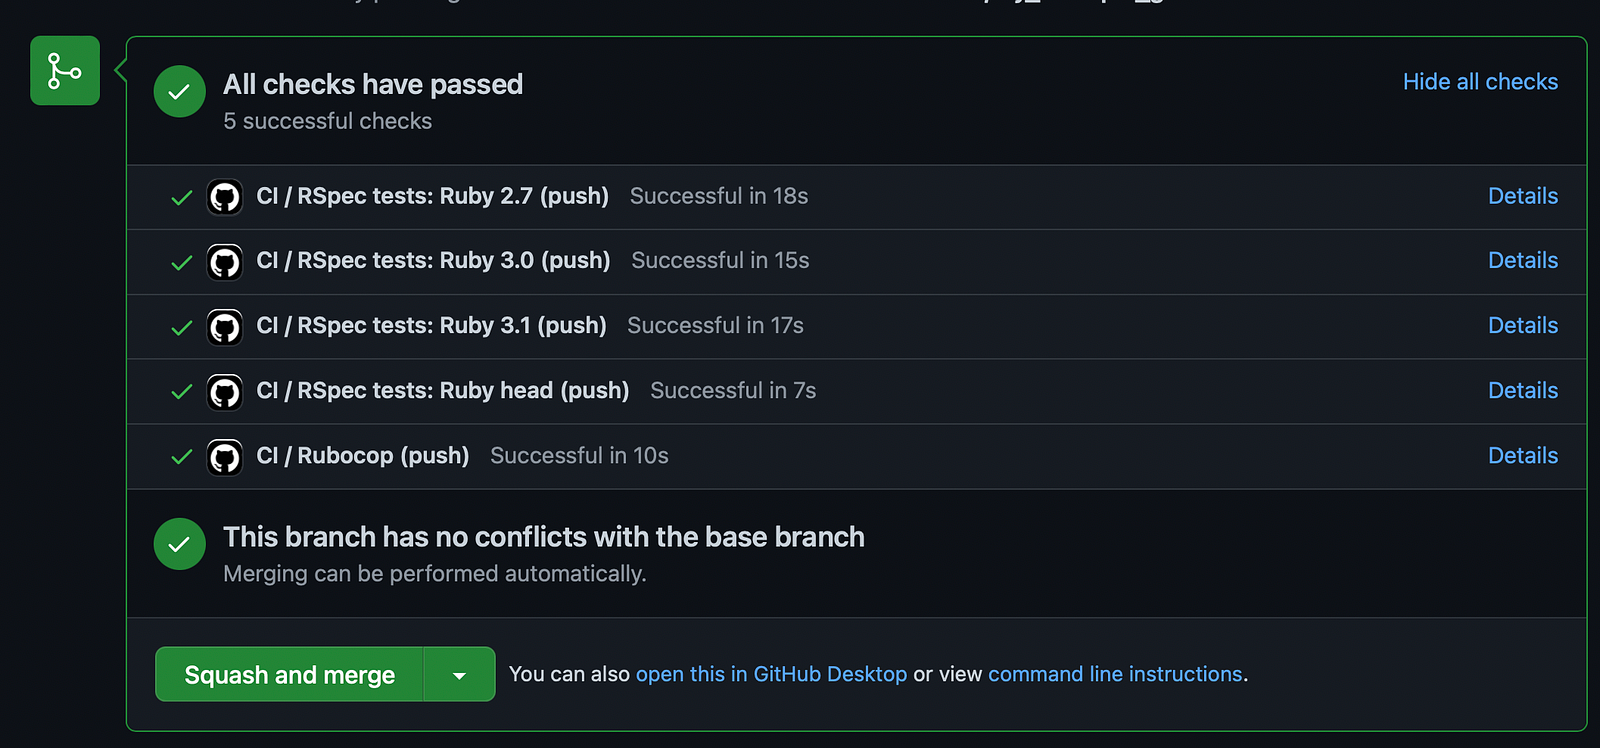
Here’s the PR:

With that, everything passes!
Once I merged with gh pr merge -d , tests were automatically kicked off on main . Once those completed, a CD action was kicked off. Note to see kicked off CD actions, you need to navigate to the “Actions” tab of your repository, which for me is here: https://github.com/alexevanczuk/my_example_gem/actions
You can also follow along with workflows locally with gh run watch
Here is the CD action:

And here is the listing in rubygems.org for my new gem!

Lastly, check out this lovely autogenerated release page!

Did you know you can link to specific lines in a GitHub Action log? For example, here's the link to the command that was used to generate the release: https://github.com/alexevanczuk/my_example_gem/actions/runs/3259482118/jobs/5352349524#step:5:1
This is a great feature if you want to share failures with others!
With this, not only do I never have to manually deploy, but other contributors can also deploy for themselves without needing to share access to API keys! Other contributors also have visibility into failed builds and deploys.
Important note: If you're using 2FA/MFA for RubyGems, you'll need to set it (here) to the "UI and gem signing level," and not "UI and API." Another option if you do not want to change this is to change CD to use the "workflow_dispatch" event instead of "workflow_run," which will let you and other contributors publish from the command line with the "gh run" command. You can then set the "otp_code" to be a user input, which can then be passed to the action, which can then be passed to the gem push command.
Important note: hereUI and gem signingUI and APIworkflow_dispatchworkflow_rungh runotp_codewhich can then be passed to the gem push command
Wrap Up
I think this is a good place to stop!
From here, there’s so much we can do! Besides, of course, adding behavior to your gem so its valuable for you and others to use, there are countless ways to continue to improve the development process. For example…
- We could add Sorbet for static type checking
- We could add Zeitwerk for autoloading (no more
requirestatements) - We could make a standard CLI (command-line interface) with thor
- We could make an interactive CLI with tty-prompt
- …and so much more!
Share your thoughts, questions, feedback, and what you’d like to see next as a comment here, within any of the above linked pull requests, or on the Ruby/Rails Modularity Slack Server.

