
Understanding how to build Single Sign On (SSO) using the OAuth 2.0 framework with OpenID Connect may seem like a daunting task, especially if this is your first time working with these tools. The internet is overflowing with information on the subject, but piecing everything together to form a working authorization system can be tricky.
My team encountered these difficulties first hand. As part of the Partners Engineering team at Gusto, I work to build an amazing experience for accountants, advisors, and other customers using Gusto to serve their clients. This includes ensuring a secure and easy way to connect with Gusto.
Working on SSO for Intuit was one of my first assignments as a new Gusto engineer. To learn more about authorization, I sifted through the multitude of OAuth 2.0 and OpenID Connect articles theoretically explaining what these tools were and found myself wishing there was one central location that walked me through exactly how to implement them.
This practical guide to the OAuth 2.0 framework, enhanced with OpenID Connect, will show you how to build a secure SSO system. We will take a step-by-step look at every request and response - starting with a high level overview of the process.
What is SSO?
With any SSO process there are three key players: the user, the relying party, and the identity provider. The user is the person requesting access. The account where she is requesting access is the relying party. The identify provider is the account she would like to identify herself with in order to create or access her account with the relying party.
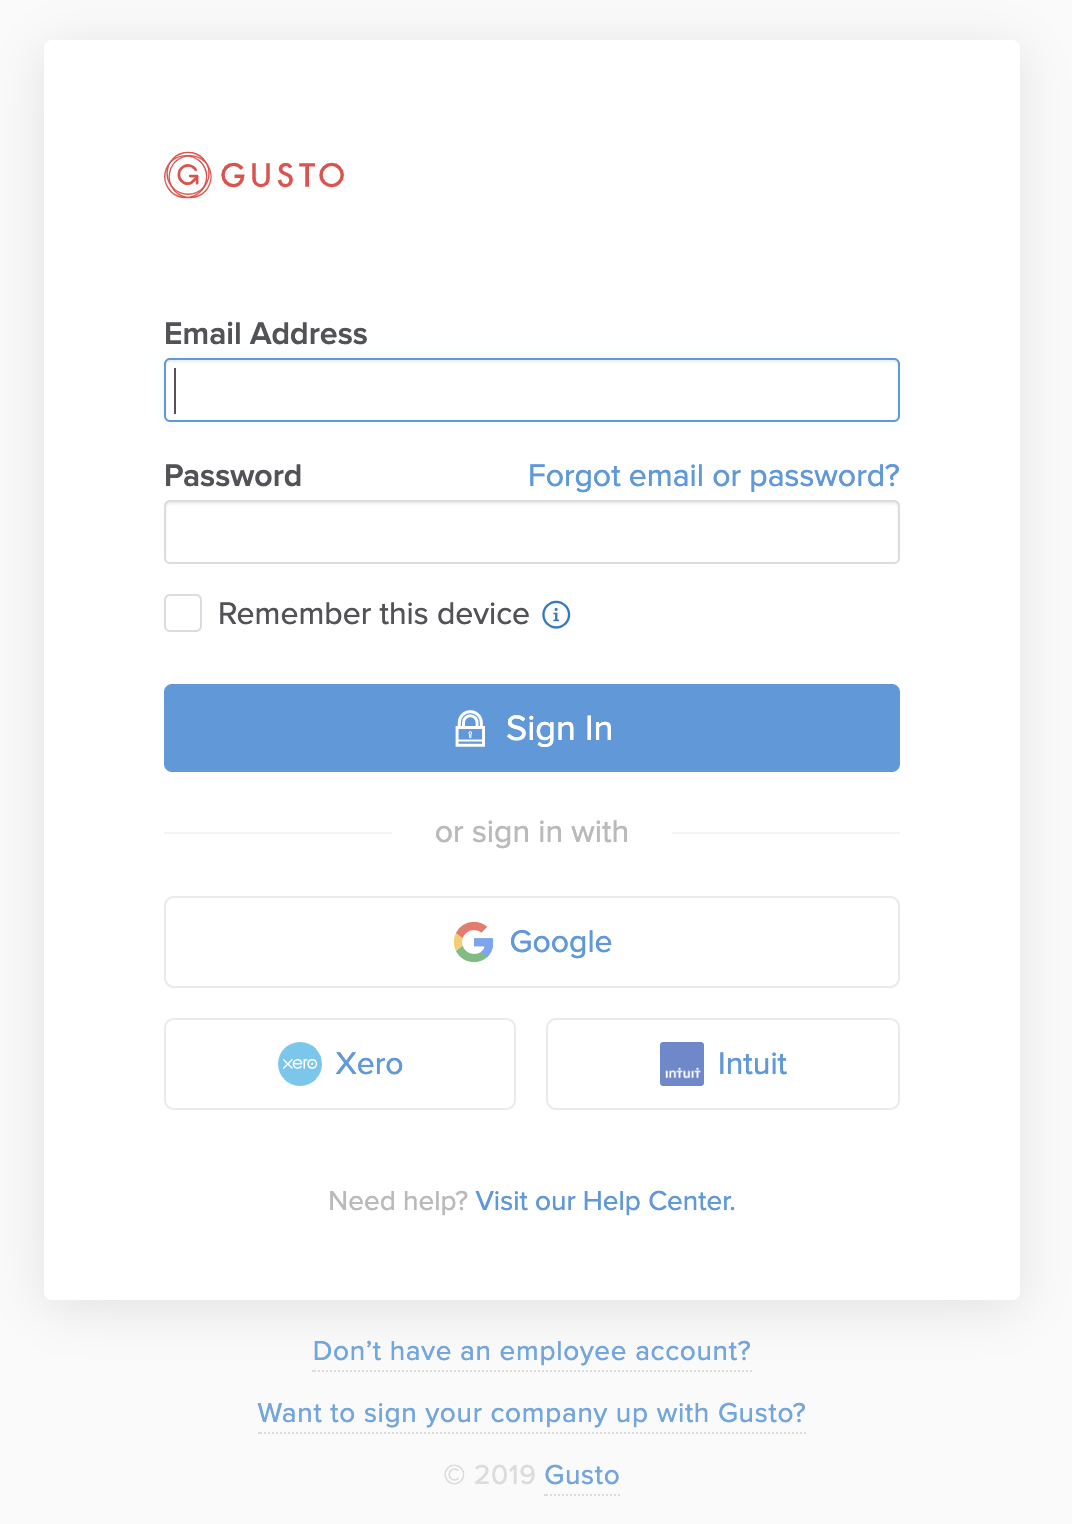
While SSO does not necessarily need to start at the login screen, it is the most easily identifiable step in the process. The user here has an option to either log in to their Gusto account or use the SSO process to sign in via Google, Xero, or Intuit. Let’s look at an SSO example of a user named Melissa signing up with Gusto via her Intuit account.
The three key players:
- Melissa - the Gusto user trying to access Gusto
- Gusto - the relying party where Melissa would like to gain access
- Intuit - the identity provider Melissa wants to use to create a Gusto account
Melissa wants to go to the Gusto homepage, click an Intuit sign in button, enter her Intuit credentials, and be redirected to her Gusto homepage. For this process to work, Gusto needs Intuit to share some of Melissa’s basic user information such as email, first name, and last name. However, Intuit cannot just hand over Melissa’s information to anyone who requests it. Intuit will need to carefully verify that the request is originating from Melissa and that Gusto is the relying party making this request for her.
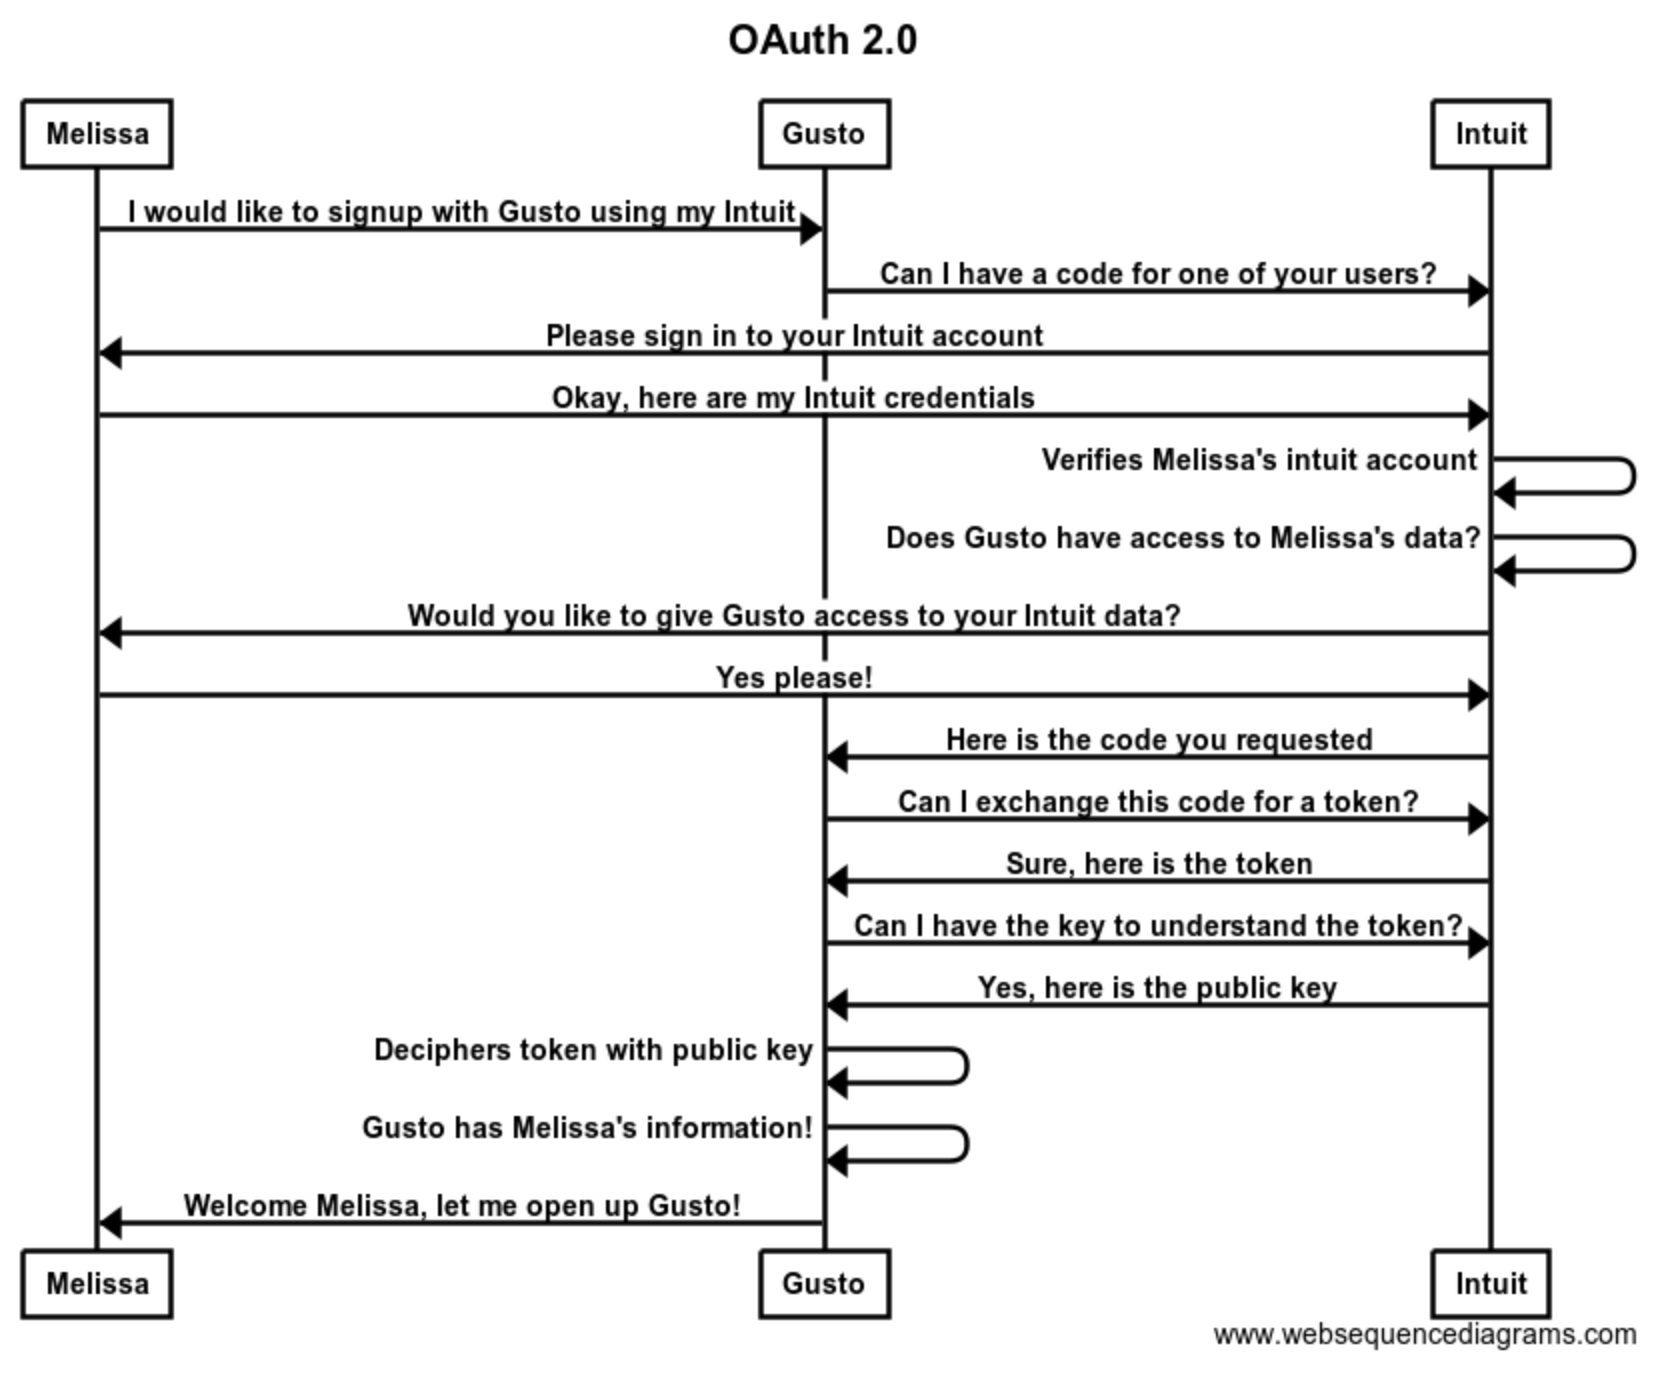
This is not a straightforward process! There is a great deal of back and forth between Melissa, Gusto, and Intuit. Let's take a closer look at this process.
Step by Step
Requesting a Code
Gusto needs to request Melissa’s data from Intuit. The first step is receiving a code from Intuit, which we will eventually swap for a token. Here is what that request looks like.
GET https://appcenter.intuit.com/connect/oauth2?client_id=your-client-id&redirect_uri= https://app.gusto.com/user/auth/intuit/callback&scope=openid%20profile email&response_type=code&state=auto-generated-state-field
| Param | Example | What is Happening? |
|---|---|---|
| Where to make request | https://appcenter.intuit.com/connect/oauth2 |
The URL defined by Intuit where Gusto sends a GET request for a code. |
| redirect_uri | https://app.gusto.com/user/auth/intuit/callback |
The redirect uri defined by Gusto. Intuit will use this redirect uri to return a code for Melissa. |
| client_id | <gustos-client-id> |
The client ID defined by Intuit which is used to help identify that Gusto is making the request |
| scope | <openid + other optional variables> |
The information Gusto requests from Intuit for Melissa |
| response_type | code |
The response type you wish to use for authorization. These types are defined by the OAuth 2.0 framework. |
| state | <auto-generated-state-field> |
This should be generated by an OAuth 2.0 library. This helps prevent phishing attacks that can result in account takeovers. |
Once we request a code from Intuit, Intuit must confirm Melissa's identity and verify that she would like to give Gusto access to her Intuit account. This process typically looks like this:
- Intuit identifies Gusto by our client_id.
- Intuit asks Melissa to login.
- Intuit looks at the scope param requested with the code request. Scope specifies which data Gusto is asking for access to.
- Intuit needs to determine if Gusto has access to the requested data (defined by the scope) for Melissa. Intuit will ask Melissa if she wants Gusto to access her data.
Do I have to use “code” for “response_type”?
There are many response types to choose from when implementing the OAuth 2.0 framework. Authorization code grant is a common SSO response type. Authorization code grants are meant for web apps where the application is not the resource owner. In Melissa’s scenario where the resource owner is Intuit and the application is Gusto, an authorization code grant is appropriate. Depending on your specific use case, you may be better off with a different resource type.
Why can’t I request a token directly?
According to the OAuth 2.0 docs, “The authorization code provides a few important security benefits, such as the ability to authenticate the client, as well as the transmission of the access token directly to the client without passing it through the resource owner's user-agent and potentially exposing it to others, including the resource owner.”
Basically, without requesting a code first the relying party cannot ensure that the requester is who they say they are.
Returning the Code
Once Intuit has verified Gusto can receive Melissa’s information, Intuit will send Gusto a code via a GET request to the redirect_uri defined in the Code Request params.
GET https://gusto.com/user/auth/intuit/callback?state=<state-field-from-gusto>&code=<code-from-intuit>
| Param | Example | What is Happening? |
|---|---|---|
| state | <state> |
Defined by Gusto on initial request and returned unchanged by the identity provider |
| code | <code> |
Created by the identity provider, used to exchange for a jwt token |
State
One of the major updates in OAuth 2.0 is the addition of a state parameter, which addresses a dangerous security gap in OAuth 1.0. The state parameter is defined by the requester and verified upon return of the code.
Step One is complete! Finally. Now we have a code and can exchange that code for Melissa’s token.
Exchanging the Code for a Token
We finally have our first response from Intuit! Gusto can now request an access token for the user through a POST request to the token url.
POST https://oauth.platform.intuit.com/oauth2/v1/tokens/bearer
grant_type=authorization_code
&client_id=<gustos-client-id>
&client_secret=<gustos-client-secret>
&redirect_url=https://app.gusto.com/user/auth/intuit/callback
&code=<code-provided-by-intuit>
| Param | Example | What is Happening? |
|---|---|---|
| token url | https://oauth.platform.intuit.com/oauth2/v1/tokens/bearer |
Defined by Intuit |
| grant_type | authorization_code |
We selected response_type code, so we are exchanging a code for a token. These types are defined by the OAuth 2.0 framework. |
| client_id | <gustos-client-id> |
The client ID defined by Intuit which is used to help identify Gusto as the requester |
| client_secret | <gustos-client-secret> |
The client secret defined by Intuit for Gusto’s developer account. While the client_id is public, the client_secret should remain private at all times. This secret proves to Intuit that Gusto, the only entity with access to the client_secret, is making this request |
| redirect_url | https://app.gusto.com/user/auth/intuit/callback |
As an added measure of security, Intuit will verify that the redirect URL in this request matches exactly the redirect URL that was included in the initial authorization request for this authorization code. |
| code | <code-provided-by-intuit> |
The code we went through all that effort to retrieve! |
If successful, this POST request will return a JWT token which can be used to access information about Melissa. JWT (JSON Web Tokens) is a standard that defines a compact way for securely sending data as a JSON object.
HTTP/1.1 200
Content-Type: application/json
{
  "access_token": <jwt-access-token>,
  "expires_in": 3600,
  "token_type": "bearer",
  "x_refresh_token_expires_in": 8726400,
  "refresh_token": <refresh-token>,
  "id_token": <jwt-id-token>
}
Validate the JWT Signature
Congratulations - you have Melissa’s token! Your work is almost complete. Now we can decode the token using the public key. This public key is usually stored on the identity provider’s website. For example, Intuit’s public key is https://oauth.platform.intuit.com/op/v1/jwks. We take the public key and use a JWT library to decode the token with this key.
Public key structure is defined by OpenID Connect Standards. The contents of the public key are defined by Intuit, so any user can access the public key and decipher JWT authorization data returned by Intuit.
Finally Access Melissa’s Data
Once deciphered, the JWT gives us access to Melissa’s Intuit user data. Gusto can take this data and use it to improve Melissa’s Gusto experience. In this case, we would store a record in Gusto’s database linking Melissa’s Intuit user ID to her Gusto user ID. The next time Melissa signs in to Gusto with Intuit, we will check our database for an existing mapping between her Intuit and Gusto accounts. When we find this mapping we can automatically log her in and redirect her to the Gusto dashboard.
{
 "sub": <melissa-intuit-user-id>,
 "aud": [
  <aud>
 ],
 "auth_time": 1552063954,
 "iss": "https://oauth.platform.intuit.com/op/v1",
 "exp": 1552067567,
 "iat": 1552063967
}
Strategy Manager
Authentication gets complicated. Utilizing a strategy manager can help standardize the process. Strategy managers can handle multiple authentication providers, making it easy for developers to connect with new identity providers.
Pitfalls
Once you finally retrieve the token, it may feel as though your work is complete. However, while some places will send user information within the jwt token, others require an additional request for user information. Be sure to carefully read through the docs in order to determine if this additional step is required for your specific authorization scenario. Your strategy manager should accommodate this additional step.
Another common pitfall is receiving an invalid_grant error when exchanging a code for a token. While this error seems unhelpful, it is probably telling you one of two things - your code has expired or the redirect url is invalid. In order to provide additional security, many identity providers will require the requester to define a list of acceptable redirect uris. If the redirect uri defined in the token request is not identical to the predefined acceptable redirect uri, you may receive an invalid_grant error.
Resources
Still confused? Walk through this process step by step with this OpenID Connect Playground. Another great resource for decoding jwt tokens is this JWT Debugger.

